


In this blog post, we'll learn how to set-up an access point on Linux, using hostapd and dnsmasq, to provide Internet to WiFi clients.
During penetration tests, whether wireless or wired, sometimes we need to share Internet. It could be for just having connectivity to do some quick research, a MITM attack to capture client traffic for reconnaissance, a captive portal, or to make an attack look more realistic to name a few.
While there are tools to help with that task, they may not always fit the attack scenario due to all the changes they are making, and this post breaks down the different steps, which allows you to integrate it in your workflow or script(s).
Requirements
We will need the following tools:
Package installation
For debian-based distributions:
sudo apt install hostapd dnsmasq aircrack-ng iproute2 iw nftables
For most RPM-based distributions, run the following command
sudo apt install hostapd dnsmasq aircrack-ng iproute iw nftables
Assumptions
We are making the following assumptions about the network interfaces:
- Internet is coming from eth0.
- WLAN interface is wlan0, and is in managed mode (aka client mode).
If this differs on your system, you will just have to adjust the interface names. Internet could be coming from another WLAN connection or Mobile broadband such as LTE or 5G. In those cases, there will often be manual set-up needed, that is not covered in this post. Using a WLAN as Internet will be covered in a later post.
Ensuring our WiFi adapter supports AP mode
Not all WiFi adapters support access point mode, so it is important to ensure the one we'll be using does. The command listing that information requires to know the physical interface name of the adapter.
While it can be done with iw dev, the output of sudo airmon-ng is easier to understand, in my opinion:
┌──(kali㉿kali)-[~]
└─$ sudo airmon-ng

PHY     Interface       Driver          Chipset

phy0    wlan0           mt7921u         MediaTek Inc. Wireless_Device
The first column, PHY, is the physical interface. What is displayed with ifconfig or ip are the virtual interfaces, which can be seen here under the Interface column, and in this case, there is currently only one: wlan0.
Note: adapters can sometimes have multiple virtual interfaces, in different modes (access point, client mode, monitor mode). However, there are caveats. That will be the topic of a different blog post.
Now, we'll run iw phy0 info to ensure it can do AP mode. Look for Supported interface modes somewhat at the top of the output:
...
        Supported interface modes:
                 * managed
                 * AP
                 * AP/VLAN
                 * monitor
...
This confirms our adapter supports AP mode.
Enable forwarding
By default, Linux doesn't do any packet forwarding. We enable it with echo "1" | sudo tee > /proc/sys/net/ipv4/ip_forward
It won't survive a reboot, and in the event it needs to be permanent, run the following commands:
echo 'net.ipv4.ip_forward=1' | sudo tee > /etc/sysctl.d/99-ipforward.conf
sysctl -a
That will create a new sysctl configuration file, which gets loaded at boot time. To disable it, simply delete 99-ipforward.conf and rerun sysctl -a or reboot.
IP Set-up
First, we need to stop network managers and other applications because they will interfere with the AP:
sudo airmon-ng check kill
We obviously need Internet, and stopping all the network managers remove the interfaces configuration. We need to set up IP information on it, which can either be done statically, or if a DHCP server is present on the network, with sudo dhclient eth0.
We need to set a static IP for wlan0 where we have all the WiFi clients:
ip link set wlan0 up
ip addr add 192.168.0.1/24 dev wlan0
Note: Both interfaces must have a different network range.
Firewall rules
In order to make Internet available to the connected WiFi clients, we need to masquerade anything that goes out through eth0:
nft add table nat
nft -- add chain nat prerouting { type nat hook prerouting priority -100 \; }
nft add chain nat postrouting { type nat hook postrouting priority 100 \; }
nft add rule nat postrouting oifname "eth0" masquerade
While we are forwarding packets, they have an IP address which doesn't match the one on eth0, and thus packets will be dropped. This rewrites the origin IP in the packets before sending them to eth0. The kernel also does connection tracking to match incoming packets and rewrite the correct IP address when sending the responses back through wlan0.
In the event we need to integrate into existing iptables rules, add the following rules:
iptables -P FORWARD ACCEPT
iptables -t nat -A POSTROUTING -s 192.168.0.0/24 -o eth0 -j MASQUERADE
Set-up and start dnsmasq
Create dnsmasq configuration file (dnsmasq.conf) to provide DHCP and DNS:
domain-needed
bogus-priv
filterwin2k
server=1.1.1.1
# Listen address is better because, with "interface", it will also listen on "lo"
listen-address=192.168.0.1
no-hosts
dhcp-range=192.168.0.50,192.168.0.150,12h
In the event a different network range was used for wlan0, update the dhcp-range value accordingly.
Then start it with sudo dnsmasq -C dnsmasq.conf
Set-up and run hostapd
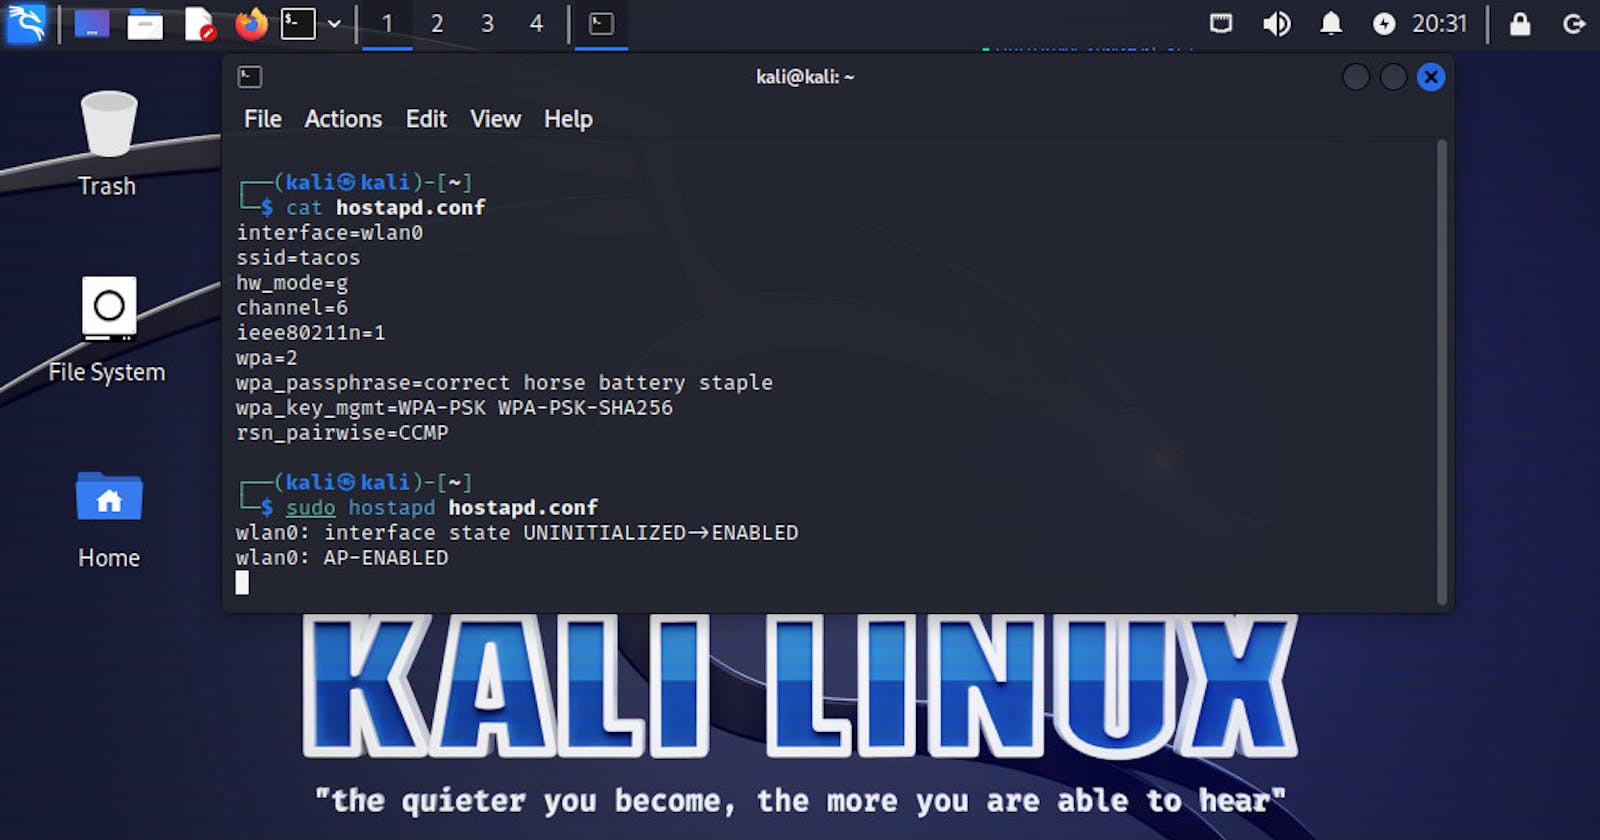
Create hostapd.conf for an 802.11n AP on channel 6 called tacos using WPA2 CCMP with correct horse battery staple as a passphrase:
interface=wlan0
ssid=tacos
hw_mode=g
channel=6
ieee80211n=1
wpa=2
wpa_passphrase=correct horse battery staple
wpa_key_mgmt=WPA-PSK
rsn_pairwise=CCMP
wmm_enabled=1
Note: To use WPA3 PSK (SAE), replace WPA-PSK by SAE in wpa_key_mgmt, and add ieee80211w=2.
Now, start hostapd with sudo hostapd hostapd.conf
When all goes well, we should see an output similar to:
wlan0: interface state UNINITIALIZED->ENABLED
wlan0: AP-ENABLED
The last line indicates it started successfully. Next time we run hostapd, we now can add -B to the above command so hostapd starts in the background.
And then?
We're now ready to accept clients, who will have Internet access.
One last thing
Logs for hostapd and dnsmasq will also be visible in journalctl. Before starting dnsmasq and hostapd, run sudo journalctl --follow. This will display the last few lines in the log, and display new ones as they arrive, until you hit Ctrl-C.
When a new WiFi client connects, the following output will be displayed:
hostapd: wlan0: STA 10:ab:03:9a:9c:b7 IEEE 802.11: authenticated
hostapd: wlan0: STA 10:ab:03:9a:9c:b7 IEEE 802.11: associated (aid 1)
hostapd: wlan0: STA 10:ab:03:9a:9c:b7 RADIUS: starting accounting session BDF235E5988CF859
hostapd: wlan0: STA 10:ab:03:9a:9c:b7 WPA: pairwise key handshake completed (RSN)
dnsmasq-dhcp[1536]: DHCPDISCOVER(wlan0) 10:ab:03:9a:9c:b7
dnsmasq-dhcp[1536]: DHCPOFFER(wlan0) 192.168.0.83 10:ab:03:9a:9c:b7
dnsmasq-dhcp[1536]: DHCPREQUEST(wlan0) 192.168.0.83 10:ab:03:9a:9c:b7
dnsmasq-dhcp[1536]: DHCPACK(wlan0) 192.168.0.83 10:ab:03:9a:9c:b7
In this log, we can see that the station 10:ab:03:9a:9c:b7 connected to the access point (authentication then association), and successfully did the 4-way handshake (RSN stands for Robust Security Network, and it's WPA2), then requested an IP via DHCP and received a lease for 192.168.0.83.